Field note · plants
Tree Identification by Leaf: A Practical Field Guide
by Nicholas Donovan · · 12 min read
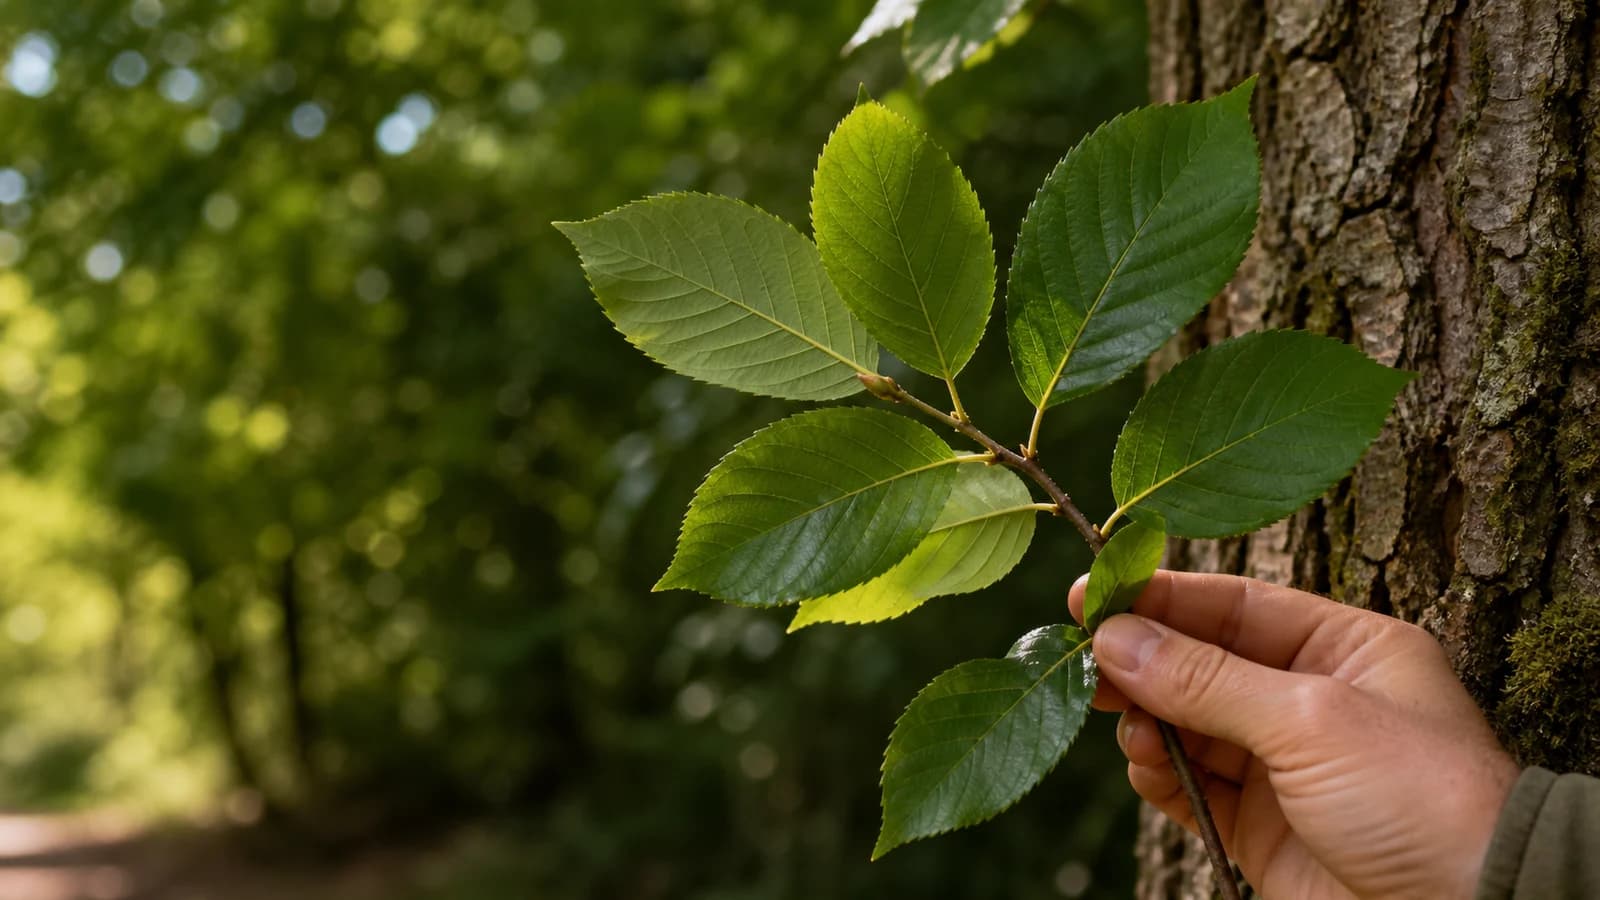
Identify a tree by moving through the clues in a fixed order: leaf type, arrangement on the twig, edge, lobes, overall shape, vein pattern, surface, stem, buds, bark, fruit or cones, range, habitat, and season. Start with several leaves attached to a living twig. A single fallen leaf can narrow the possibilities, but it often cannot confirm a species.
Photograph the whole tree and canopy, an intact twig with several leaves, both leaf surfaces, the bark, and any buds, flowers, fruit, seeds, or cones. Keep the original location and date. Those extra views help you reject a convincing but incorrect leaf match.
First decide whether you have a leaf, a leaflet, or a needle
A simple leaf has one blade attached to a stem called a petiole. A compound leaf divides into multiple leaflets along a central stalk. The most reliable practical clue sits at the base: a true leaf usually has a bud where its petiole meets the twig. An individual leaflet does not.
Check where the entire structure attaches. If you mistake one leaflet for one leaf, every later key choice can lead to the wrong tree.
Conifers may carry needles or scale-like leaves instead of broad blades. Record whether needles attach singly, in bundles, or in clusters, and whether scale-like leaves form flattened sprays. Add cones when present.
The US Forest Service plant key recommends checking several leaves and highlights the bud-at-the-base distinction between simple leaves and leaflets.
Read the arrangement on the twig
Leaf arrangement quickly removes large groups of candidates.
| Arrangement | What you see |
|---|---|
| Opposite | Two leaves or buds meet the twig at the same node, across from each other |
| Alternate | One leaf or bud meets each node, switching sides along the twig |
| Whorled | Three or more leaves meet at one node |
| Basal or clustered | Leaves gather near the base or at short shoots rather than spacing evenly |
Photograph the twig from far enough away to show at least three nodes. A close-up of one petiole cannot prove a repeating arrangement. The University of Minnesota Extension tree-identification guide uses opposite versus alternate arrangement as an early decision, alongside leaf edge and shape.
Separate simple from compound leaves
Compound leaves commonly appear as:
- pinnate, with leaflets arranged along one central stalk;
- palmate, with leaflets spreading from one point;
- bipinnate, with the central divisions divided again.
Look for the terminal bud on the actual twig. The central stalk of a compound leaf ends without a twig bud. Then count leaflets, note whether a terminal leaflet exists, and record whether leaflet pairs sit opposite or alternate along the stalk.
Do not identify the tree from leaflet count alone. The count may vary on the same tree, and damaged leaves can lose leaflets.
Describe the leaf edge before the overall shape
The margin is the blade's edge.
- Entire: smooth, without teeth or lobes.
- Serrate: saw-like teeth that generally point toward the tip.
- Doubly serrate: larger teeth carry smaller teeth.
- Crenate: rounded teeth.
- Lobed: deep or shallow projections separated by sinuses.
- Undulate: a wavy edge without true teeth or lobes.
Use a sharp close-up against a plain background. Keep part of the twig in another frame so the close-up remains connected to the specimen. Young shoots, shade leaves, insect damage, and hybrids can alter the margin, so compare several mature leaves.
Describe lobes and sinuses precisely
When a leaf has lobes, ask:
- Do the main veins radiate from one point or branch from a central midrib?
- Are the lobes rounded, pointed, or bristle-tipped?
- How deep are the sinuses between lobes?
- Does the base form a wedge, straight line, rounded shape, or heart-shaped notch?
- Does the pattern repeat across several leaves?
These clues can separate broad groups such as maples, oaks, sycamores, and sweetgums, but regional species and hybrids can overlap. Never convert “oak-like” into a species name without checking the twig, buds, fruit, bark, and range.
Record shape, tip, base, and proportions
Common shape terms include linear, lanceolate, elliptic, ovate, obovate, orbicular, and heart-shaped. You do not need to memorize the vocabulary before you start. Record what you see in plain language:
- widest near the base, middle, or tip;
- longer than wide or almost round;
- pointed, rounded, notched, or drawn-out tip;
- symmetrical or uneven base;
- approximate length and width;
- petiole length.
Place a ruler in the same plane as the leaf. Perspective can make a near ruler and a distant leaf look comparable when they are not.
Follow the veins
Veins can radiate from the base, branch from one midrib, run almost parallel, curve toward the margin, or form a dense network. Look at both sides of the leaf. Raised veins, small hairs, color, and surface texture may show more clearly underneath.
Avoid backlighting so strong that it erases surface color. Capture one evenly lit frame and one translucent view when vein structure matters.
Use the twig, buds, and leaf scars
Leaves change or disappear. Twigs preserve another set of clues:
- bud arrangement and shape;
- number and pattern of bud scales;
- leaf-scar shape;
- dots or vascular-bundle scars within the leaf scar;
- twig color, hair, thorns, scent, or pith;
- whether a terminal bud exists.
Do not cut branches solely for an app result. Photograph an accessible living twig or use fallen material when it clearly belongs to the tree. Follow local park, protected-area, and private-property rules.
Add bark, fruit, flowers, and the whole tree
Leaf evidence becomes much stronger when independent clues agree.
Bark: Record color, ridges, plates, peeling, smooth areas, lenticels, and how the pattern changes from young branches to the mature trunk.
Fruit or cones: Acorns, samaras, berries, pods, nuts, and cones can separate trees with similar leaves. Never taste an unknown fruit.
Flowers: Record clusters, color, petal count, and season without picking protected or scarce material.
Canopy and branching: Step back and photograph the tree's full silhouette, branching pattern, and approximate scale. The Natural History Museum's interactive tree key demonstrates why identification works as a sequence of observable choices, not a single visual guess.
Compare the complete record in Leafr
Leafr starts with the tree, then lets you compare visible clues from leaves, bark, fruit, flowers, cones, canopy, place, and season beside a likely name. Add one whole-tree photo, one intact leafy twig, both leaf surfaces, and one bark frame. Review which clues support the result and which evidence you still need before you accept the identification.
Use range, habitat, and season as evidence
A leaf can resemble a species that does not grow in your region. Record country, broad region, elevation when relevant, habitat, soil moisture, nearby water, whether the tree appears planted, and the date.
Range maps help reject impossible candidates, but planted ornamentals and escaped species can sit outside a native range. Urban trees may also include cultivated varieties with unusual leaf color or shape.
Season changes the evidence. Spring leaves may not reach mature shape. Summer gives full foliage. Autumn changes color and can loosen leaves from their source. Winter shifts the task toward twigs, buds, bark, fruit, and branching.
Avoid these common identification failures
Using one fallen leaf
Wind, water, mowing, and people can move leaves away from the source tree. Match the fallen leaf to attached leaves before you record the tree.
Photographing only the top surface
The underside may show vein relief, hair, glands, color, or other diagnostic features. Capture both sides.
Ignoring variation on one tree
Sun and shade leaves can differ. Young shoots may carry unusually large or deeply lobed leaves. Compare several mature leaves from accessible positions.
Treating a confidence score as certainty
Automated identification can be wrong. Confidence describes the system's result, not a guarantee that the species is correct. Verify with a regional key and independent field characters.
Making a safety or treatment decision from a photo
Do not use a tree-identification result to decide whether to eat a fruit, prepare a medicine, treat a disease, handle a hazardous tree, or approach a damaged trunk. Ask a qualified local arborist, botanist, poison service, or land manager when safety matters.
A field checklist you can save
- Whole tree and canopy
- Intact twig with several leaves
- Leaf arrangement across at least three nodes
- Simple or compound structure
- Top and underside of a mature leaf
- Margin, lobes, veins, tip, and base
- Buds, leaf scars, and twig
- Bark on the mature trunk
- Fruit, flower, seed, or cone when present
- Country, broad location, habitat, and date
- At least one regional key or expert external check
The iNaturalist plant-photo guidance recommends multiple views, including the whole plant, both leaf surfaces, and the point where leaves attach. It also notes that one photo often cannot support a plant identification.
Frequently asked questions
Can I identify a tree from one leaf?
Sometimes one distinctive leaf can narrow the answer sharply, but it may not confirm the species. Use several attached leaves plus twig, buds, bark, fruit or cones, range, and season.
How do I tell a leaf from a leaflet?
Find the base of the structure. A true leaf usually has a bud where its petiole meets the twig. An individual leaflet does not have a twig bud at its base.
Which leaf feature should I check first?
Check arrangement on the twig and whether the leaf is simple or compound. Those structural clues usually remove more candidates than color does.
Are opposite leaves enough to identify a tree?
No. Opposite arrangement narrows the group. You still need leaf structure, margin, shape, buds, bark, fruit, range, and other clues.
Can an app guarantee the species?
No. Treat the result as a candidate. Compare the supporting clues, note contradictions and missing evidence, and verify with a regional field guide or qualified expert.
Verify your next tree
Choose one living tree and build a complete record before you name it. Use Leafr to compare the visible evidence, then test the candidate with the Arbor Day Foundation's tree-identification resources or a regional key. Use the process again in another season and note which clues changed.
Sources
- US Forest Service: Plant identification key and leaf terminology
- University of Minnesota Extension: Beginner's guide to tree identification
- Natural History Museum: Tree identification guide
- Arbor Day Foundation: Tree identification resources
- iNaturalist: Getting useful plant photos for identification
Take the index with you
The next find won't wait for a field guide.
Open Leafr AI: Tree Identifier to document your find, review the visible evidence, and decide what you need to verify next.
Open Leafr AI: Tree Identifier